Instructions

Please DON'T glue anything in place with this mod using superglue.
If you do decide to glue I'd recommend hot glue as it's easy to remove should you need to.

Head Mod

Estimated fitting time to complete 10 - 15 mins

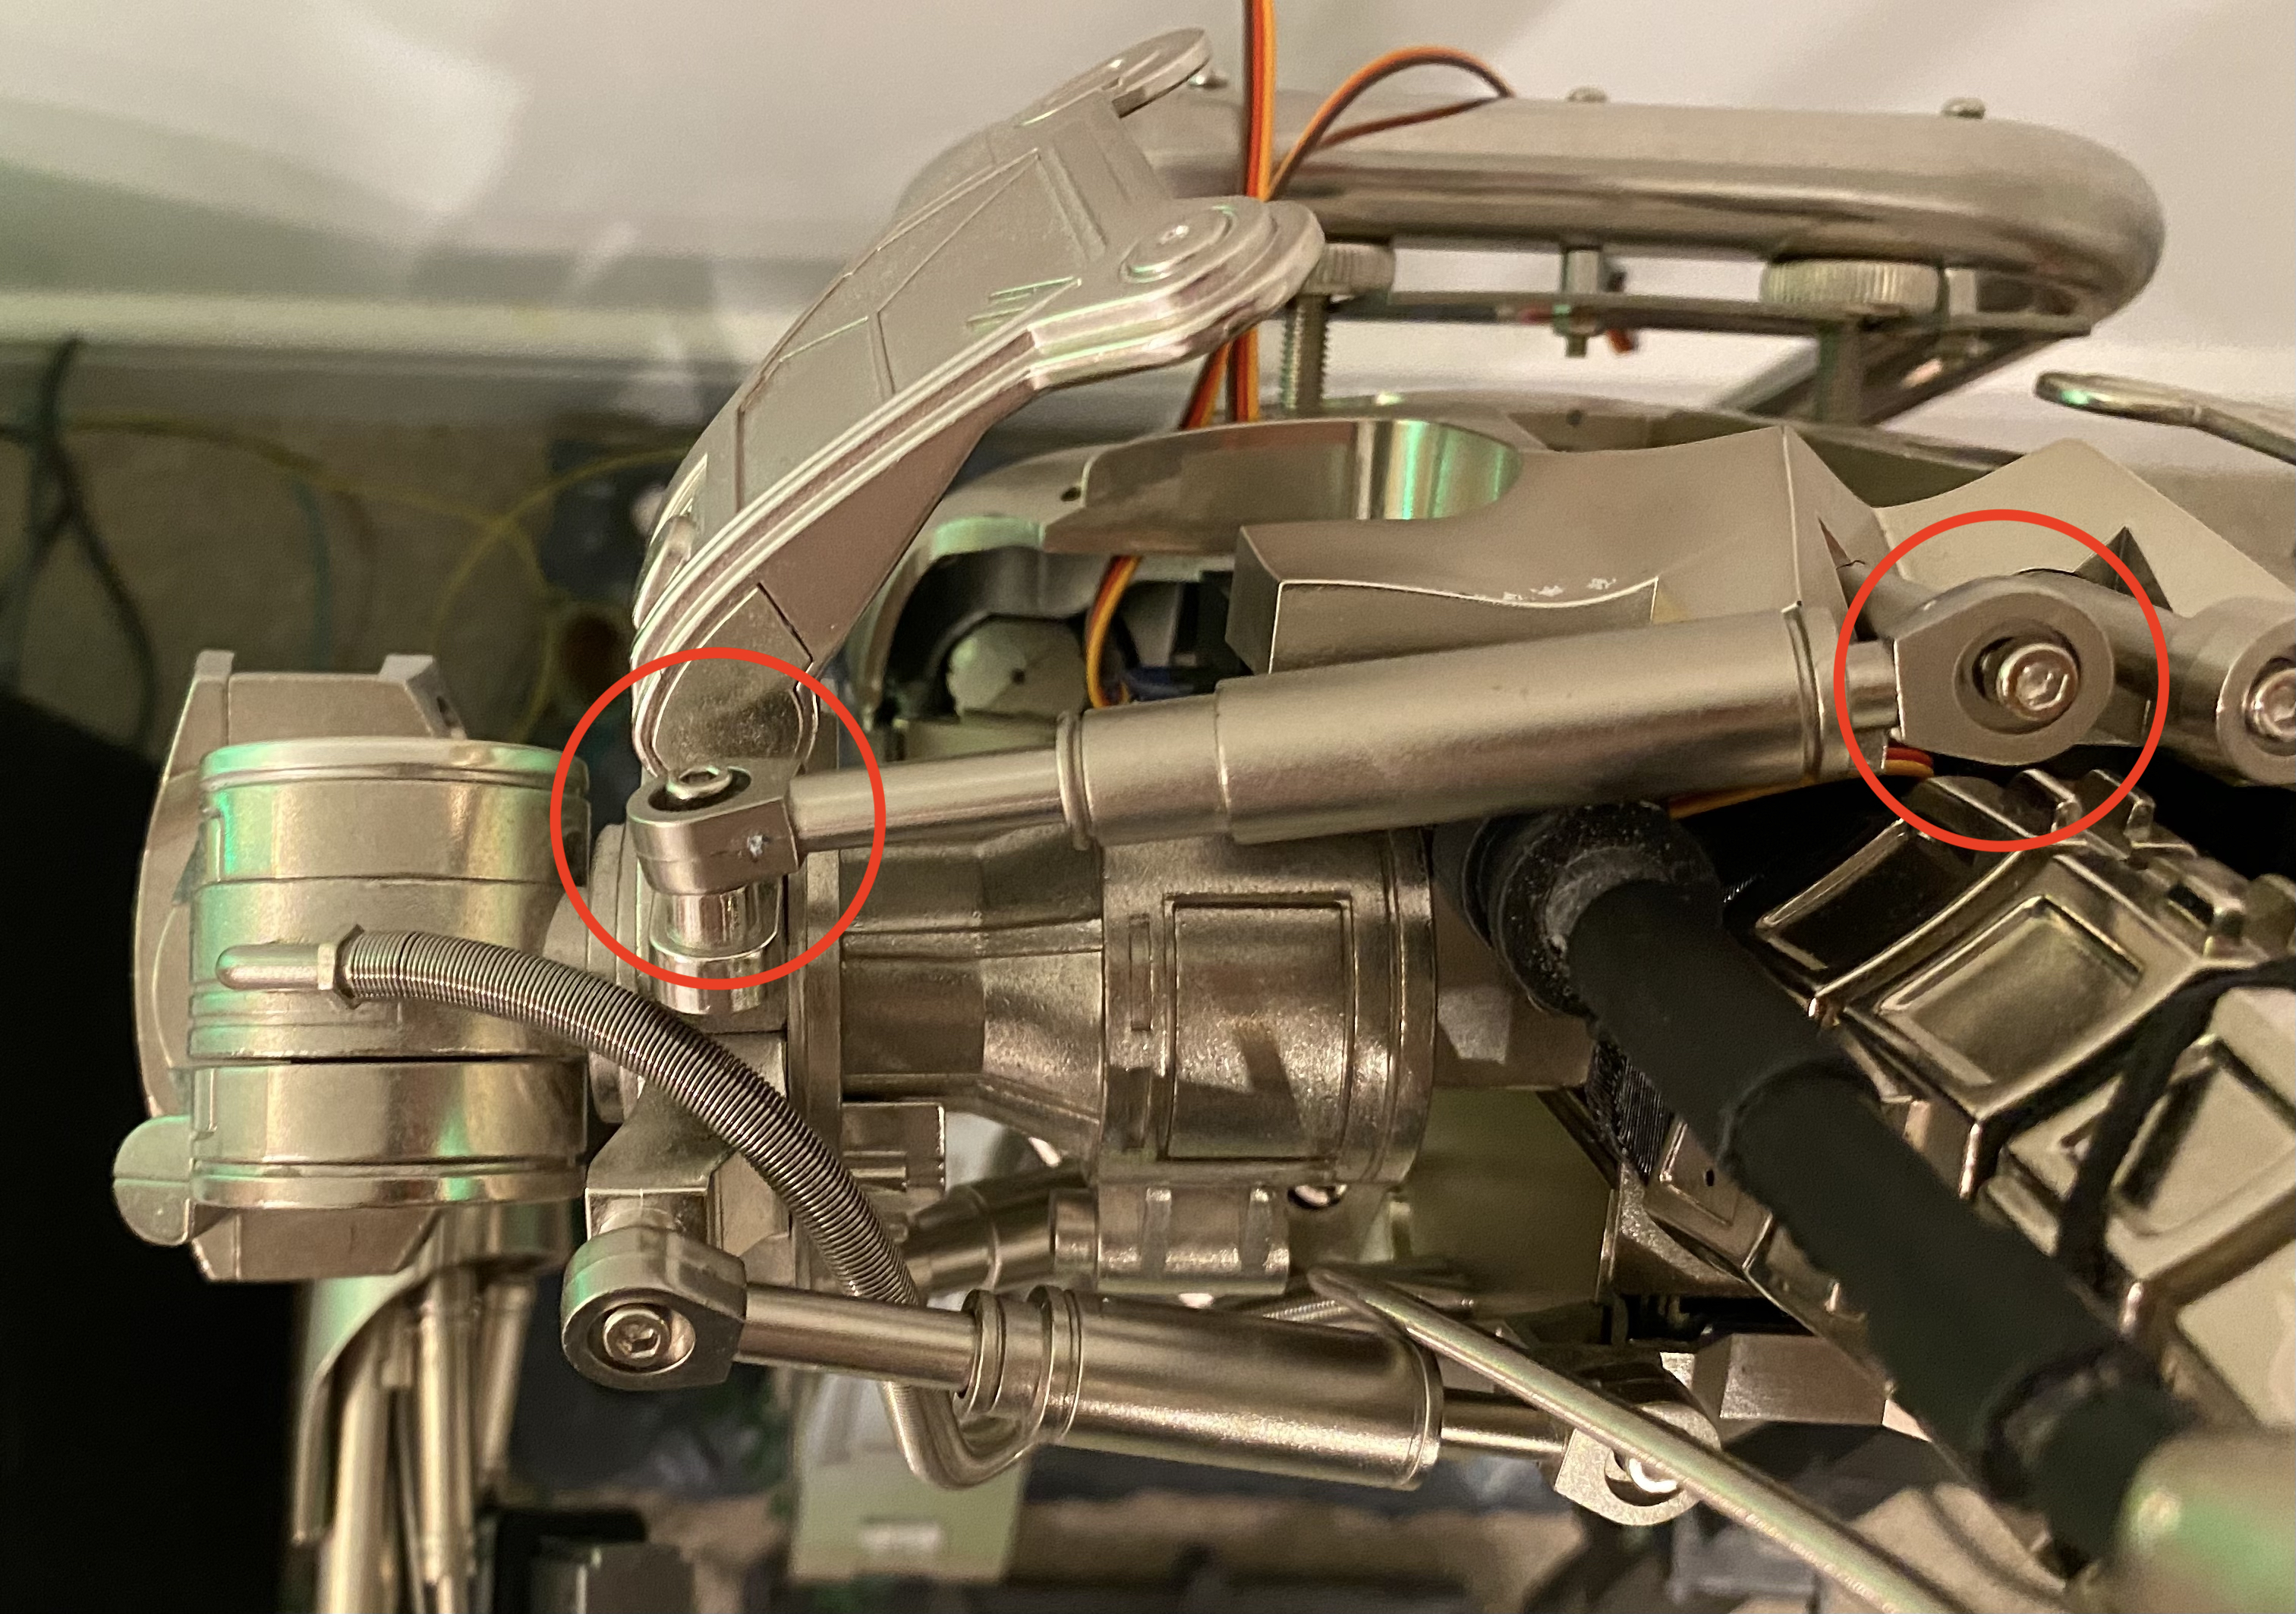
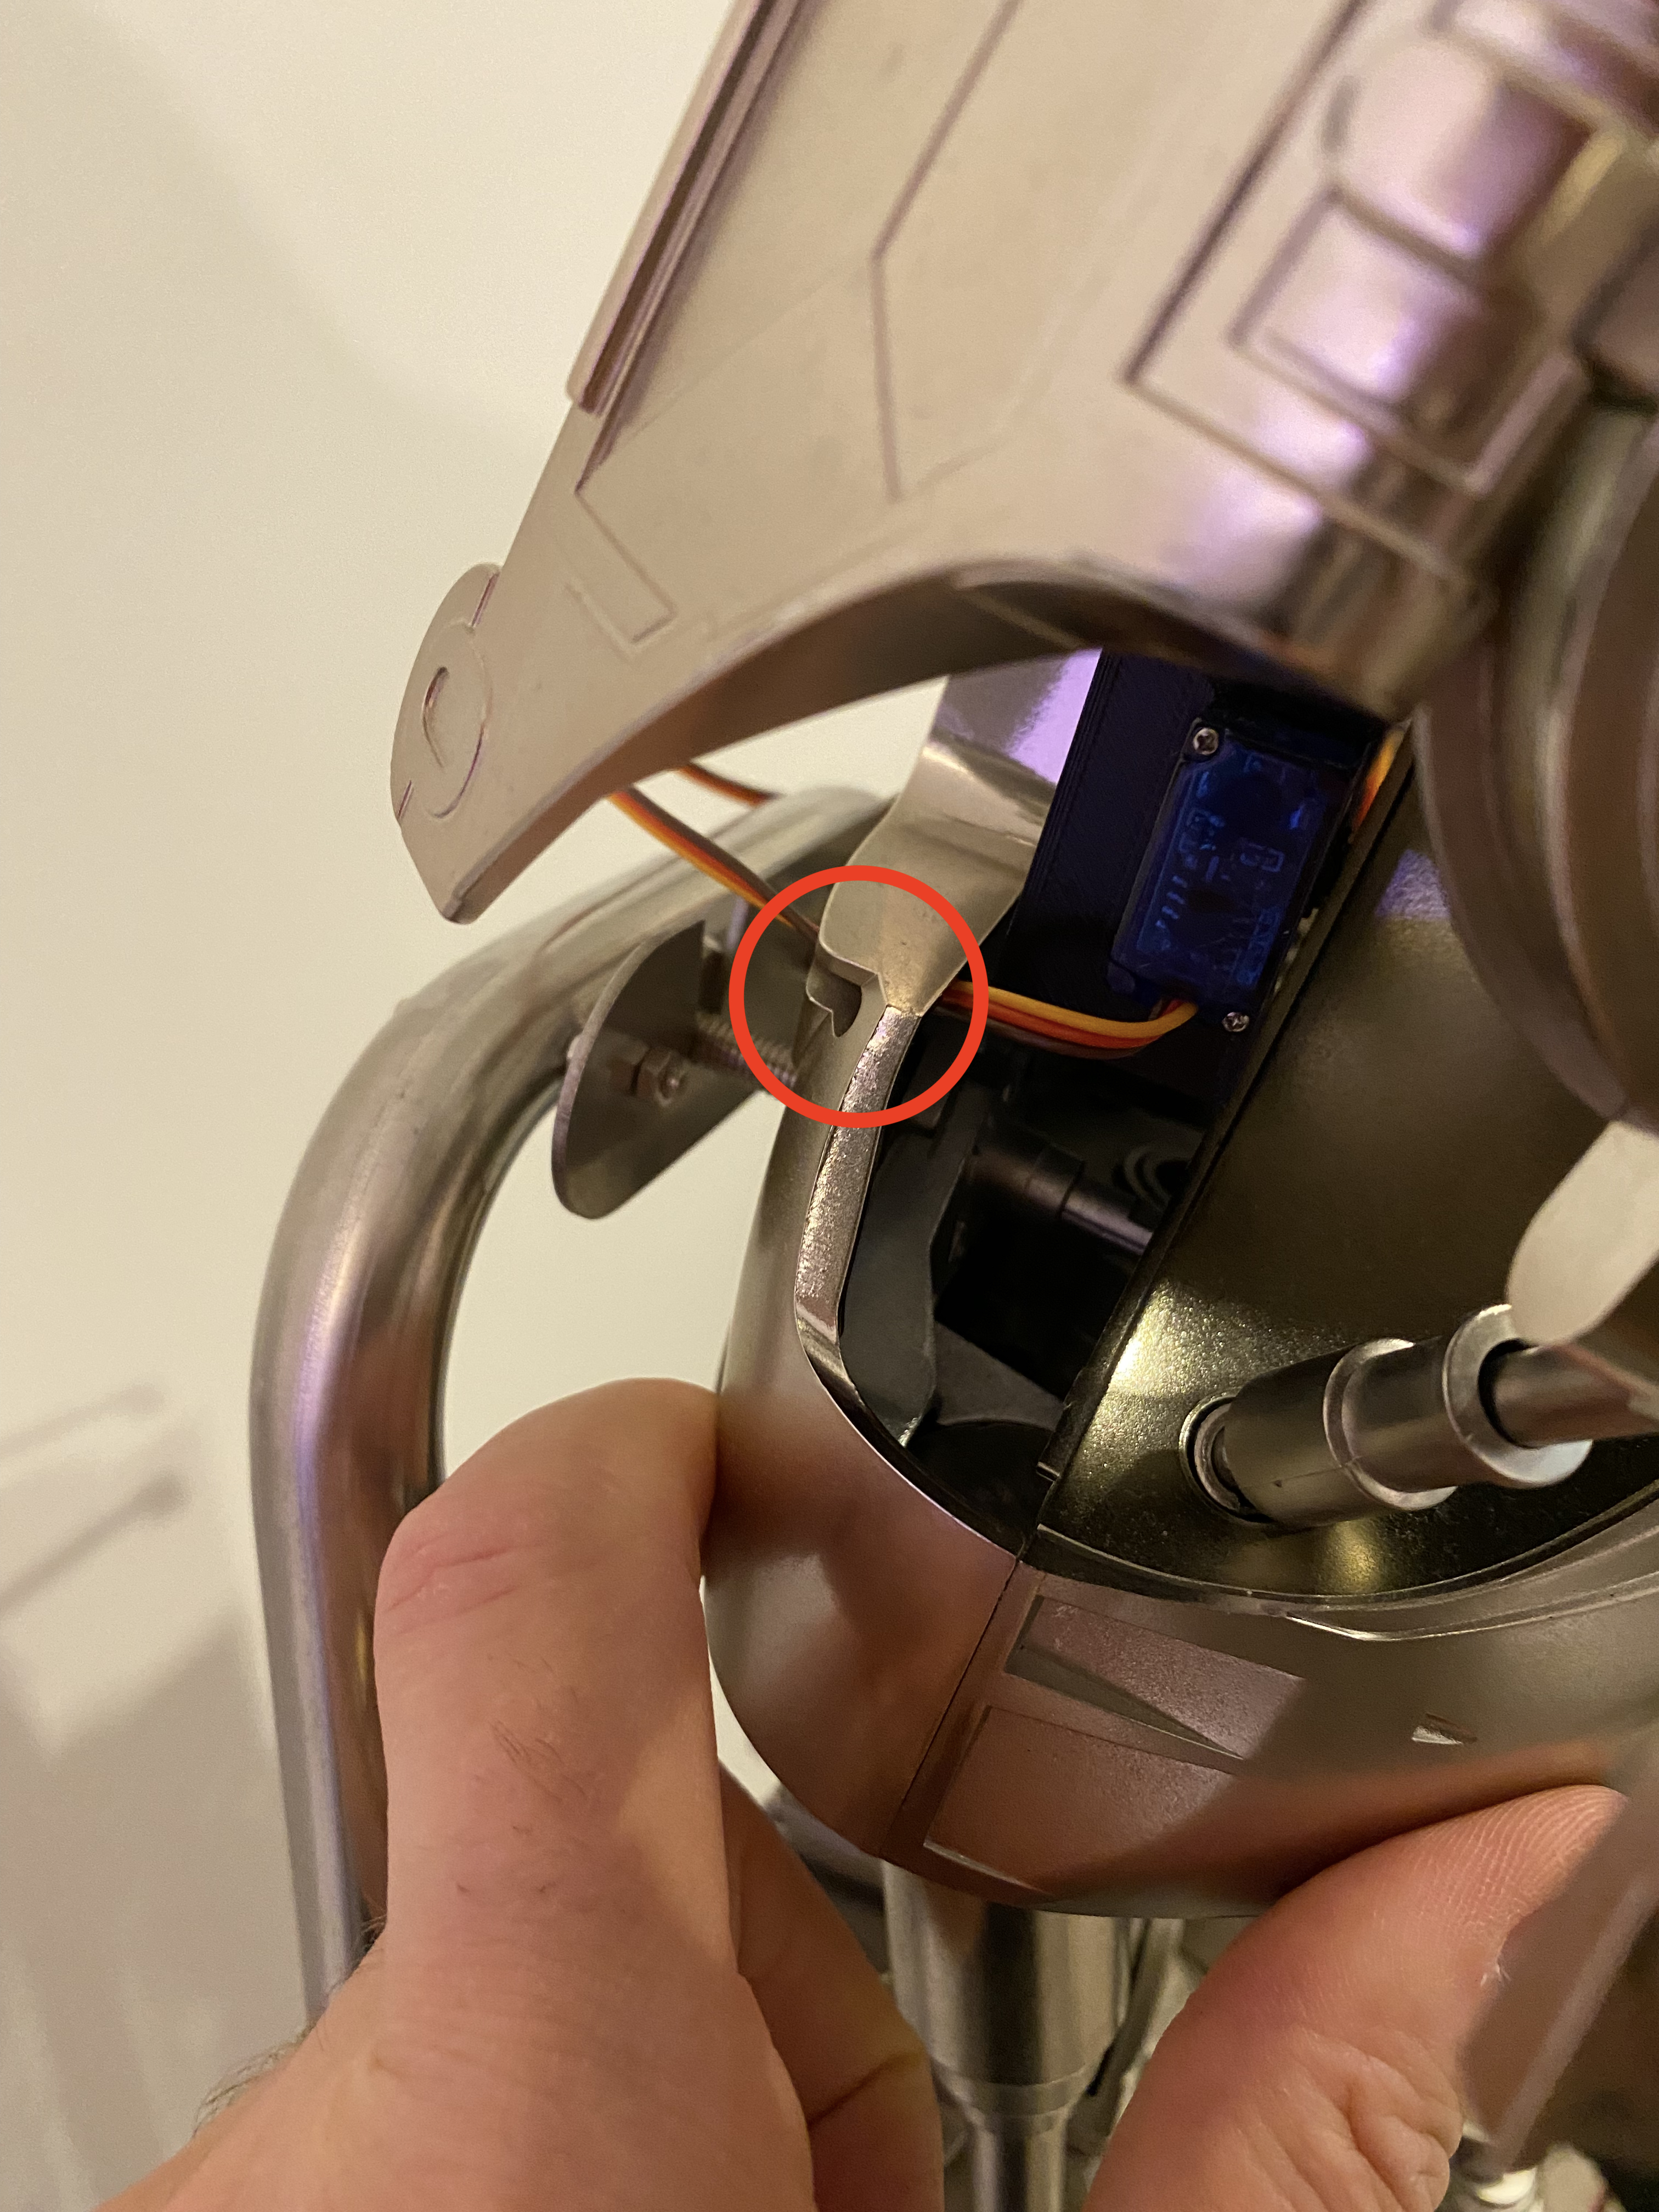
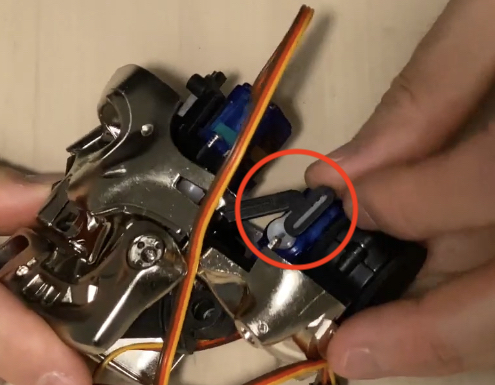
NOTE: Please ensure that the jaw mechanisim is this side of the servo horn with the black part facing you and not the white servo horn before you secure with the screw (Don't overtighten the screw, it works best when it has a bit of freedom).


Jaw Servo

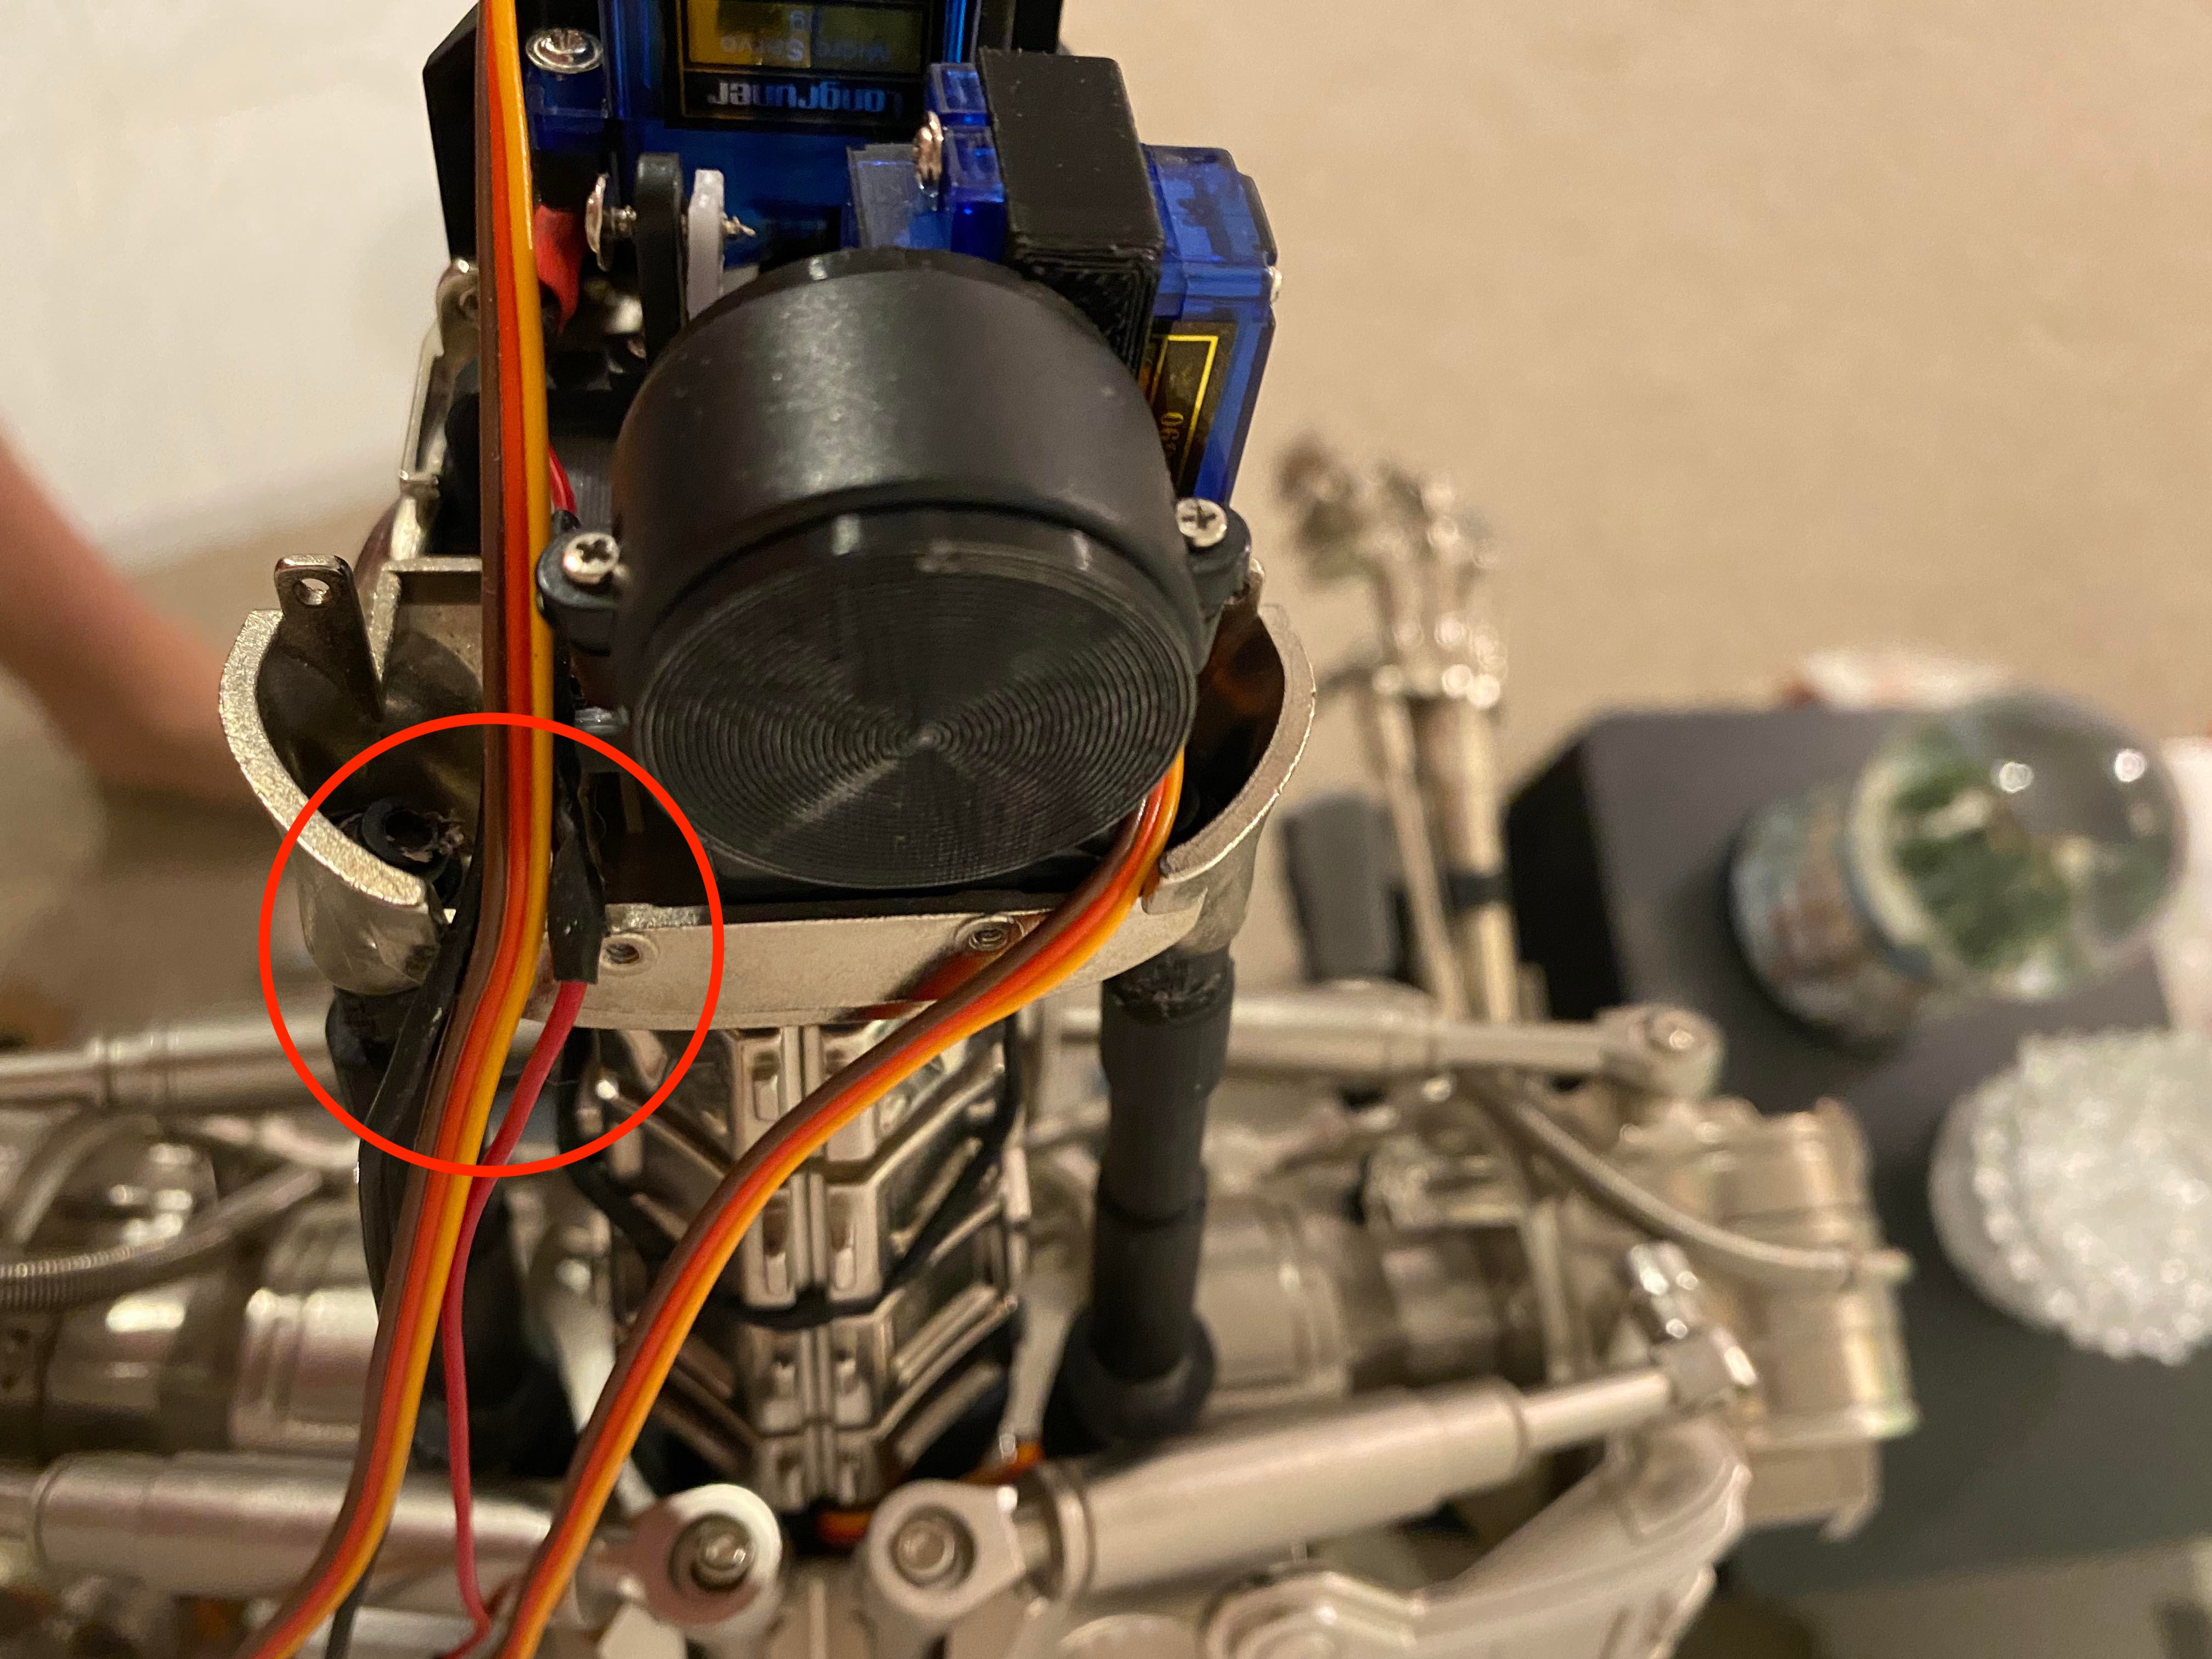
NOTE: Please also ensure that all the cables route out of the T800s left side of the rear head as shown below.

Only the jaw servo wire should route out to the right side of the rear head.

This ensures that when the eyes move left to right they're not restricted in their movement and range which can be a problem should you ignore this step.


Rear Head Wire Routing

Neck Mod

Estimated fitting time to complete 10 mins

NOTE: Before connecting the servo I make sure the shaft moves freely and very smoothly within the neck.

It may mean having to turn the shaft manually from the top of the neck quite a few times until it feels free from any resistance (due to fine printing thresholds and debris etc).

I also greased mine so it is nice and smooth. Vaseline works well if you don't have grease to hand.

Piston Mod

Estimated fitting time to complete 10 mins

NOTE: I don't fit my pistons until the neck and body are attached to the T800.

Please be careful when fitting these parts that you dont put too much downforce pressure on your T800 head otherwise you'll damage the neck mechanisims.

You will have to remove the rear collar bone pistons at the back that attach to the shoulder. See image below.

Reattach them when you've fitted your modded pistons.

DON'T overtighten the rear collar bone pistons circled red below as it will prevent up and down movement.

Pistons To Loosen

Shoulders must be posed square to allow the mechanisim to move.

Posed drooping shoulders forward or back will prevent range and in time no doubt burn out the gear and motor.

When/if you want to pose with the shoulders not square don't use the up and down commands.

A 7/64 allen key required (not included in the kit). You can find here

Pistons will be painted silver.


Torso Insert Front

As this is a hackless mod you will need to leave these back plate inserts off as the mechanisim runs into the upper torso.

To remove them just remove these 2 screws circled in red below. You can if you wish cut these inserts in two if you want to hide the internals and fit accordingly.

I prefer to keep mine hack free and so removing them only for myself.


Torso Insert Back

All cable routing can go through the small gap circled in red below and down your support poles.

Torso Insert Side

Pistons attach to the exisiting fitting on the back plate where the stock ones attach circled in red below.

Piston Connection

Pistons must be flush to the head, you'll notice they are shaped to match the head, they will push all the way in and screw down nice and snug as shown below circled Red. Please DON'T attempt to use the up and down functions until those are flush like here.

Piston Installation

Plasma Mod

Charge Plasma

Fit Plasma

Estimated fitting time to complete 10 - 15 mins

NOTE: The yellow insulated Led is the Red led and this goes into the center hole of the resin tip

(if yours doesn't have yellow insulation it is the middle wire on the ground housing so you can trace this way).

All blue leds go around the outside in each hole.

Please be very careful when inserting the leds into the resin tip and that you don't bend them as you insert them.

I would advise you don't glue them in place incase you need to swap them out in future.

Plasma Clip Mod

Estimated fitting time to complete 1 - 2 mins

NOTE: Please be very careful when seperating the clips - they are tough but if you seperate them too much they will snap!

T800 base Components Wiring Diagram


T800 base components wiring diagram

NOTE: Your kit comes 90% wired.

Just in case something works loose in transit you have this to refer to.

You will need to connect the base LEDS, eye LEDS to the Arduino and the Speaker to the MP3 as per above

Your kit comes with x5 sets of positive and ground extension cables as below to connect the base leds and speaker (JST connection wasn't possible so you will need to snip those off).

YOU WILL NEED TO ENSURE THE CONNECTION IS GOOD BEFORE CLAMPING THESE DOWN - I USE PLIARS TO DO THIS

No soldering is required on the kit at all.

Extension Cable

T800 Servo Wiring Diagram


T800 base components wiring diagram

NOTE: Your kit comes with x5 made up sets of servo wires

RED (Positive) BLACK (Negative) and YELLOW (Signal connects to Arduino specificed pin above)

You will need to route these cables down the support poles.

A 8-10mm metal drill bit is required to drill the poles. Or you can cable tie to the support poles. It's up to you how you prefer to do it.

T800 Plasma Rifle Wiring Diagram


T800 plasma rifle diagram

NOTE: Your kit comes with x1 rechargeable micro USB 9v battery with cable attached to allow for easy charging via a PC/MAC or a mains outlet.

You may be wondering why x1 Red led, well Red and Blue make Purple which is the colour for the lazer as in the movie.

To ensure the colours mix have the Red led as the center one in the LED array, it is wired this way already for you.